Measuring cutting cornice 1.
Cutting large cornice.
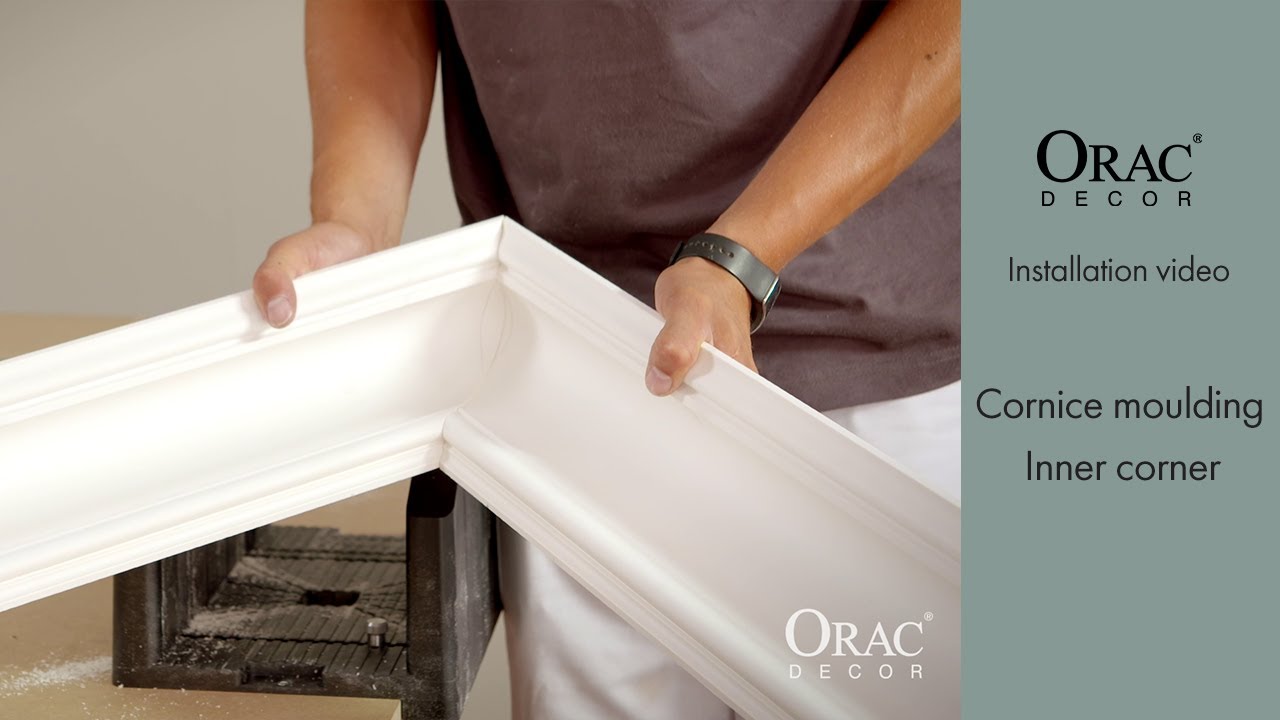
Welcome to the usg boral series of diy videos.
Measure mark meaure and check cut.
Take care that you are cutting the angle in the right direction it s very easy to get confused.
75mm for gyprock aria.
Now that you have measured the molding the next thing to do is to cut it.
Try your hand at installing cornice step 1.
A little bit of cornice tips and advice when cutting.
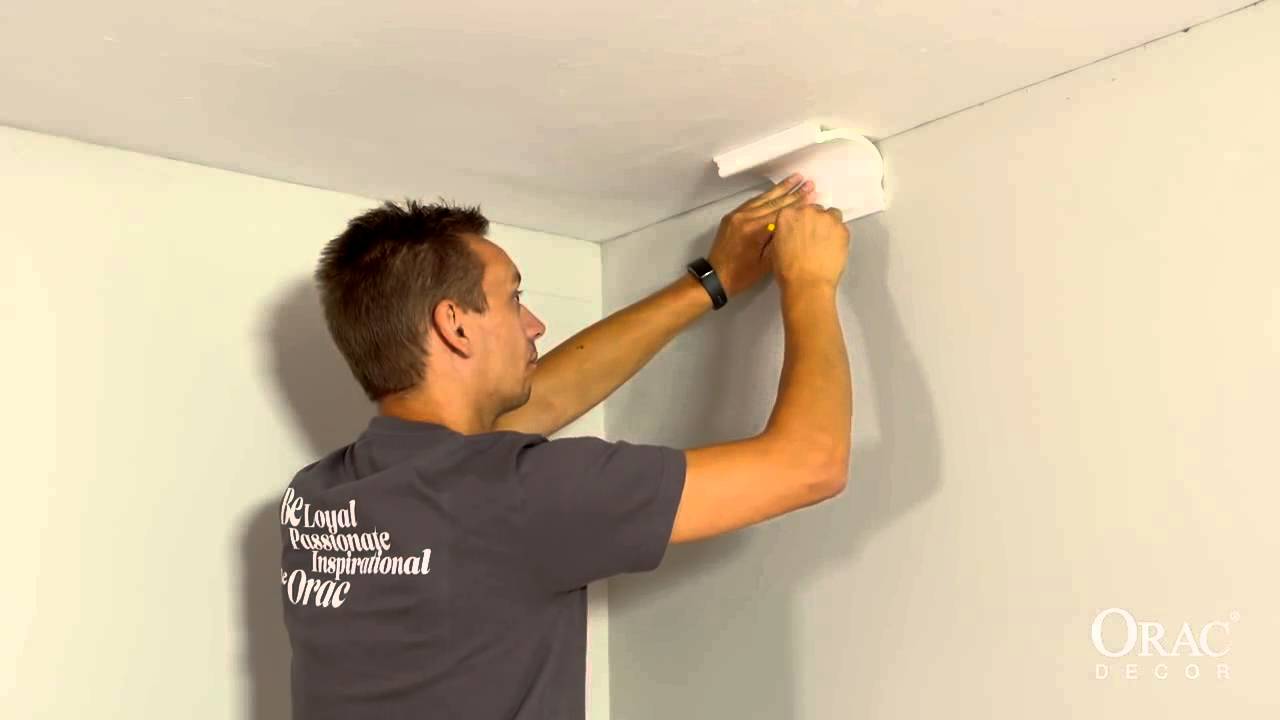
Fix it in.
I love buying tools so that s my excuse to visit the hardware.
Where the crown molding will be mounted and how the molding will be joined will determine how the cornice should ultimately be cut.
In this series we ll show you how to install a plasterboard wall ceiling and cornice.
Step 1 is to get the materials and tools.
This video shows how to cut internal and extern.
It would be easier if they.
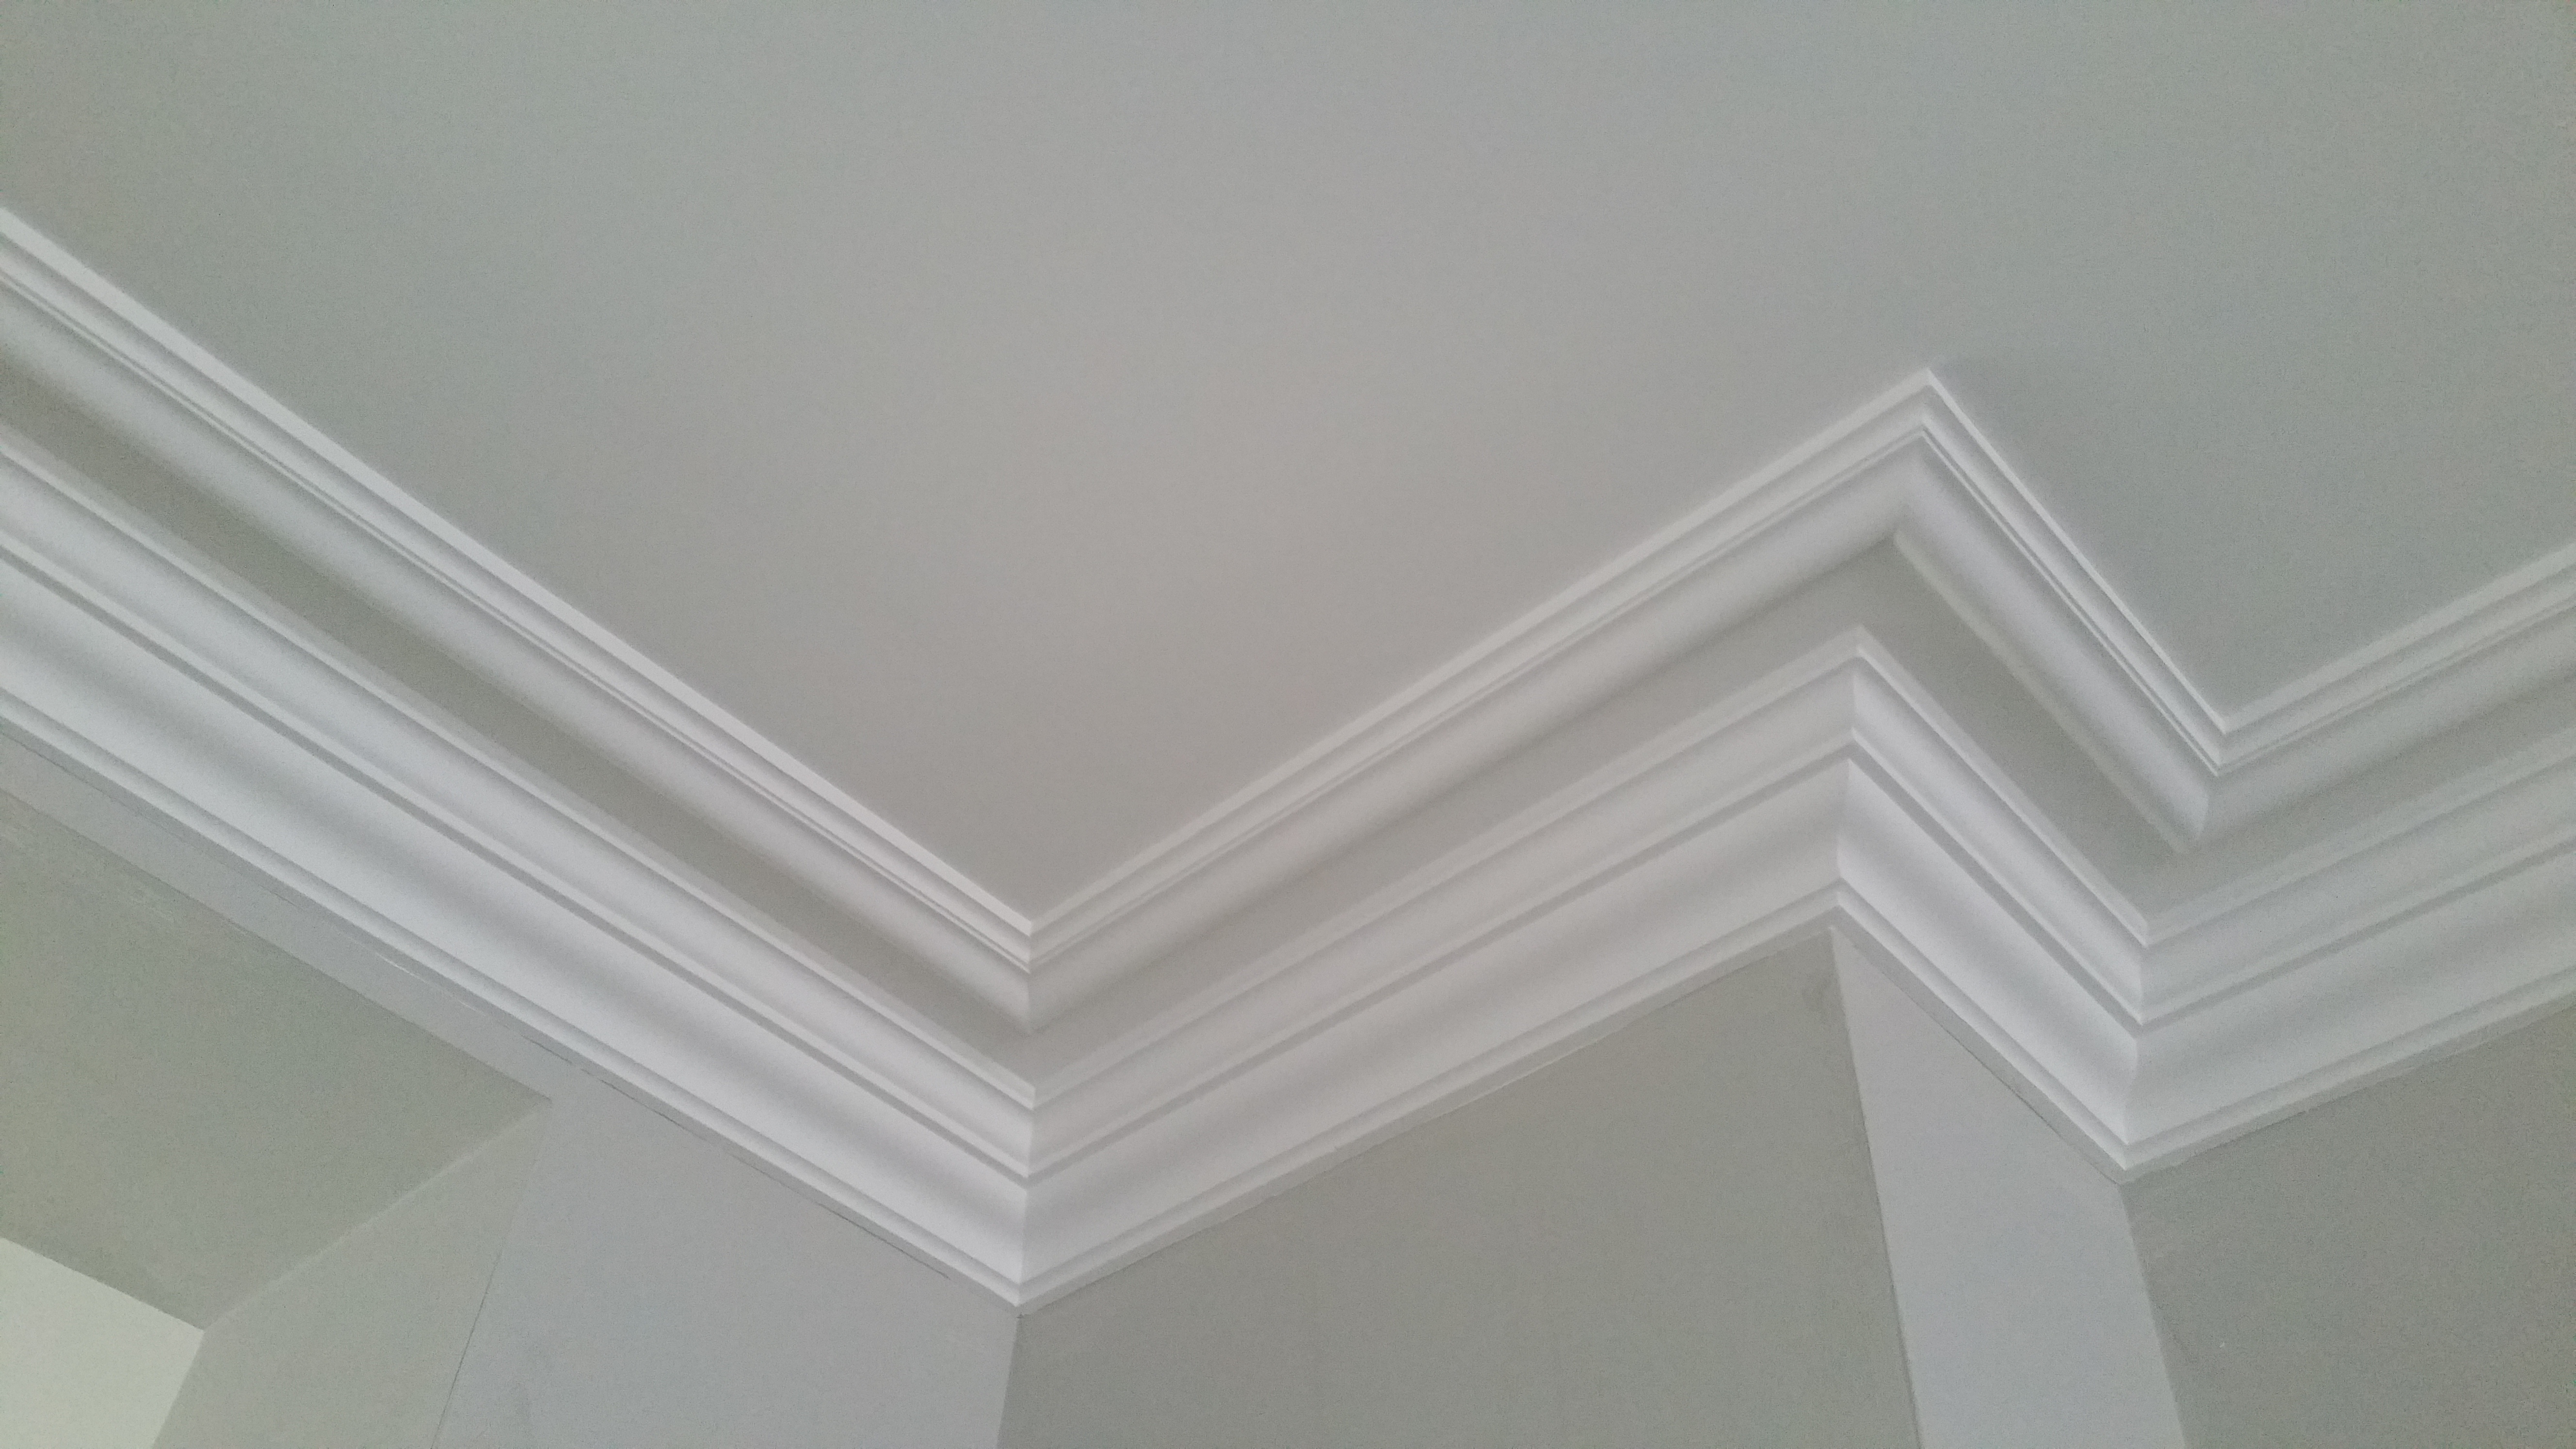
Cornice molding accentuates doors windows and permanent fixtures in a house such as fireplaces and vents.
Cut the proper amount of molding for your project.
Divide the length to be covered by the length of coving strips that you have.
Measure the length of coving you will need to cover the space on your wall and ceiling.
Use a fine toothed saw to cut the cornice coving.
Use a tape measure to determine the width of the coving you will be using.
Place the pieces upside down on the saw in such a manner that the section of the molding which will have contact with.
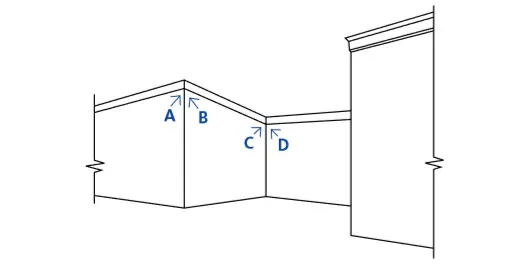
None of the corners of your room are square.
Measure from the bend in the coving to the.
Ideally use a single length of cornice for each wall however sections can be joined with butt joints.
Measure the room for each length of cornice from corner to corner at the top of the wall and mark a guide line along the wall at a distance from the ceiling equal to the size of the cornice e g.
Smooth off the cut ends using fine glass paper.
I m not the best but i remember learning it took me a while to grasp.